Journal
Sending blog posts as emails - Part 2
In the previous post, I wrote about how I built a prototype to render a Cushion journal post as an email, using the same data provided from my CMS. In this post, I’ll walk through building the rest of the system—letting people subscribe to receive new posts in their inbox, with the only extra effort on my end being the push of a button.
Designing the email template
First, I picked up where I left off by finishing the email templating system. The initial template was more of a proof-of-concept, but the final template included a few extra considerations. I wanted the design of these journal posts to keep the personal feel that they’ve always had, which means straying from the traditional design of a newsletter email, with the logo up top and a light grey background framing the content. Cushion’s monthly newsletter includes these styles, which makes sense because the newsletter is targeting users of the app, but the journal emails should feel closer to a personal email composed by me.

Since these journal posts tend to dive straight into a topic, I felt like the emails could benefit from a quick summary/reminder of what the journal is all about. To cover my bases, I point out that this is an ongoing series that dates back to 2014, that it’s about the process of building an app, specifically Cushion, and that I’m the one writing it. This should be a solid enough intro for all folks, like a user who doesn’t know about me or a Twitter follower who (somehow) doesn’t know about Cushion.
From there, I started building out the API, beginning with a preview endpoint. This endpoint fetches the post from the CMS and renders the email template using its content. I author the journal posts using Contentful’s rich text editor, which is a WYSIWYG editor that also allows “entry blocks”, like images, videos, or any custom content. For the journal’s website, I wrote custom renderers for all the entry blocks, but anyone who’s (unfortunately) had to code an email template knows that you can’t write modern HTML—you need to write HTML like it’s 1999. This means I can’t reuse the existing custom renderers from the website, but instead, I need to write new renderers for the email template. Luckily, the MJML framework numbed most of the pain and kept me from pulling my hair out.
Building the Contentful sidebar app
Once I had the preview endpoint working as expected, I shifted to the authoring experience. The main goal with this system has always been to deliver journal posts via email. This provides a sure way for folks who are interested in the journal to read the latest post as soon as it’s published. The alternative is me manually tweeting posts at a random time, hoping that folks are already following me on Twitter and happen to see the tweet at that time.
The next biggest goal was to make the process of sending emails as easy as possible for me. When I write and send the monthly Cushion newsletter, the entire process take me at least an hour—and that’s simply copy/pasting text, images, and URLs. Considering this time-suck, I really wanted the process of sending journal posts to be identical to publishing them—pressing a big button in the CMS. This meant writing a custom sidebar app in Contentful.
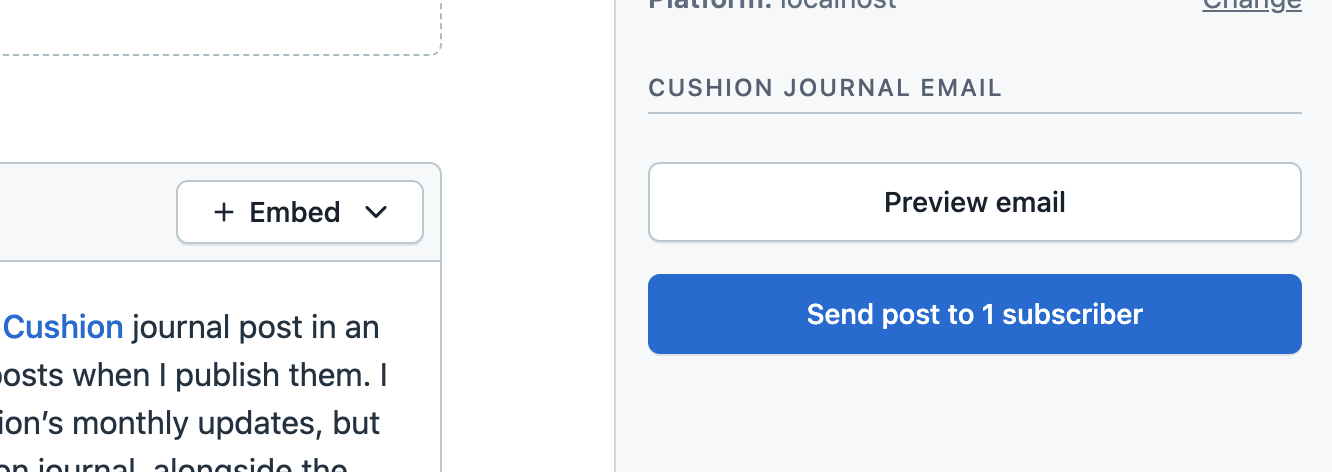
I used Contentful’s create-contentful-app CLI to bootstrap a React app with the Contentful SDK and its component library ready to go. I needed two buttons—“Preview” and ”Send”. I already wrote the preview endpoint, so wiring that button was too easy. For sending, however, I needed to write a new endpoint that takes the rendered email template and batch emails the subscriber list. Since the subscriber list itself is a snowball of to-dos, I started by hard-coding it and focusing on the email sending.
Sending the emails
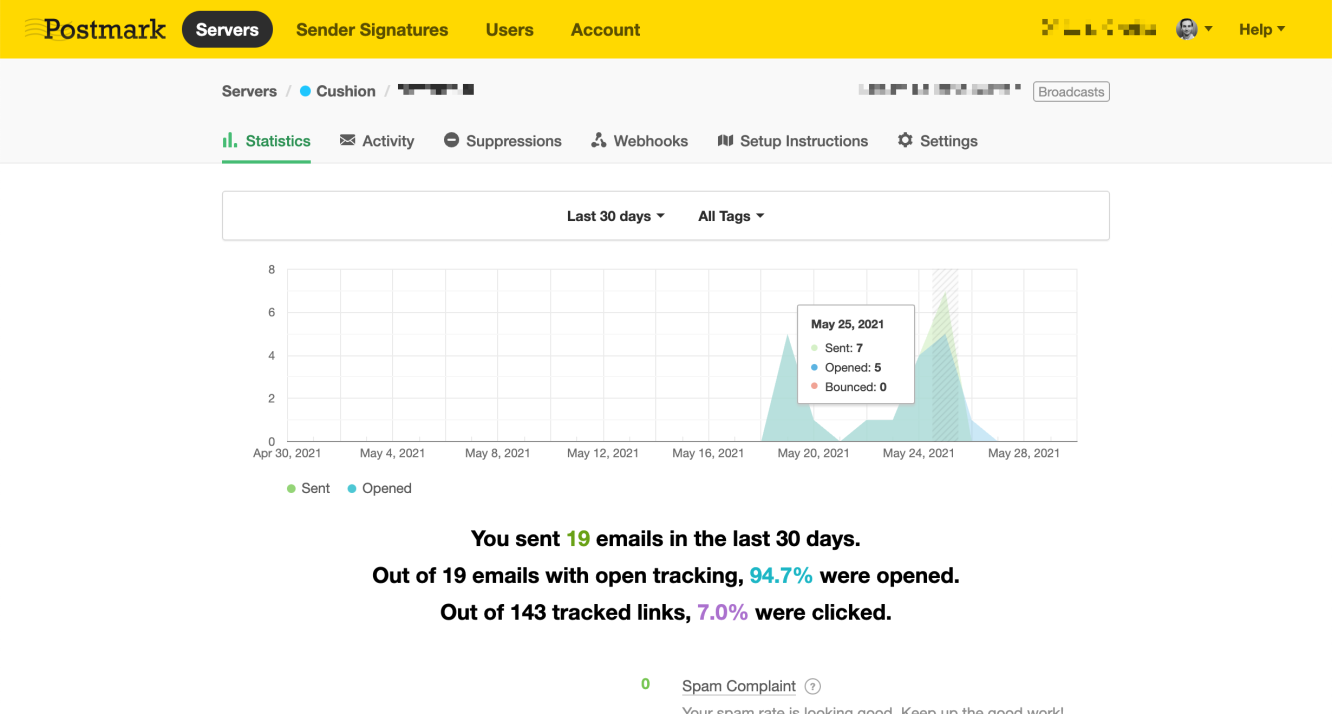
For everything email, I use Postmark. Up until recently, they only supported transactional emails, but now they support sending newsletters, too. This made my life 10x easier as I was able to simply create a new “message stream” in my Cushion account, then call a single method that sends the emails. After sending a few test emails, I had ear-to-ear smile—the email looked exactly like the preview, and exactly what I’ve always envisioned.
Using a serverless API & creating the database
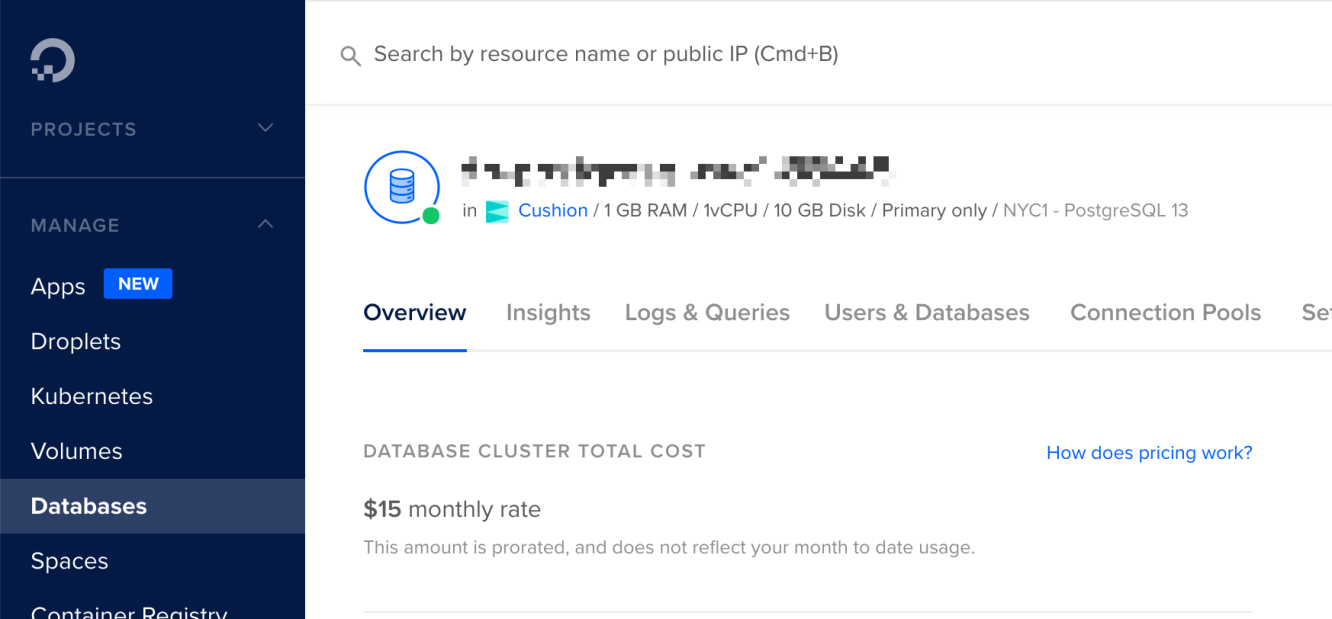
To host my personal site and Cushion’s marketing site, I use Vercel, because it’s dead-simple and super quick to deploy a website. I’ve only ever used Vercel for static sites, but I know it supports serverless functions, which are exactly what I need for my API endpoints. The only caveat with Vercel is that its BYODB (bring your own database), so I’d need to look elsewhere for a hosted database. I’ve been wanting to try Digital Ocean for a real project, so I took this opportunity to spin up a managed Postgres database on their platform. This was super easy and only cost $15/mo, which I’m more than happy to pay compared to Heroku’s $50/mo.
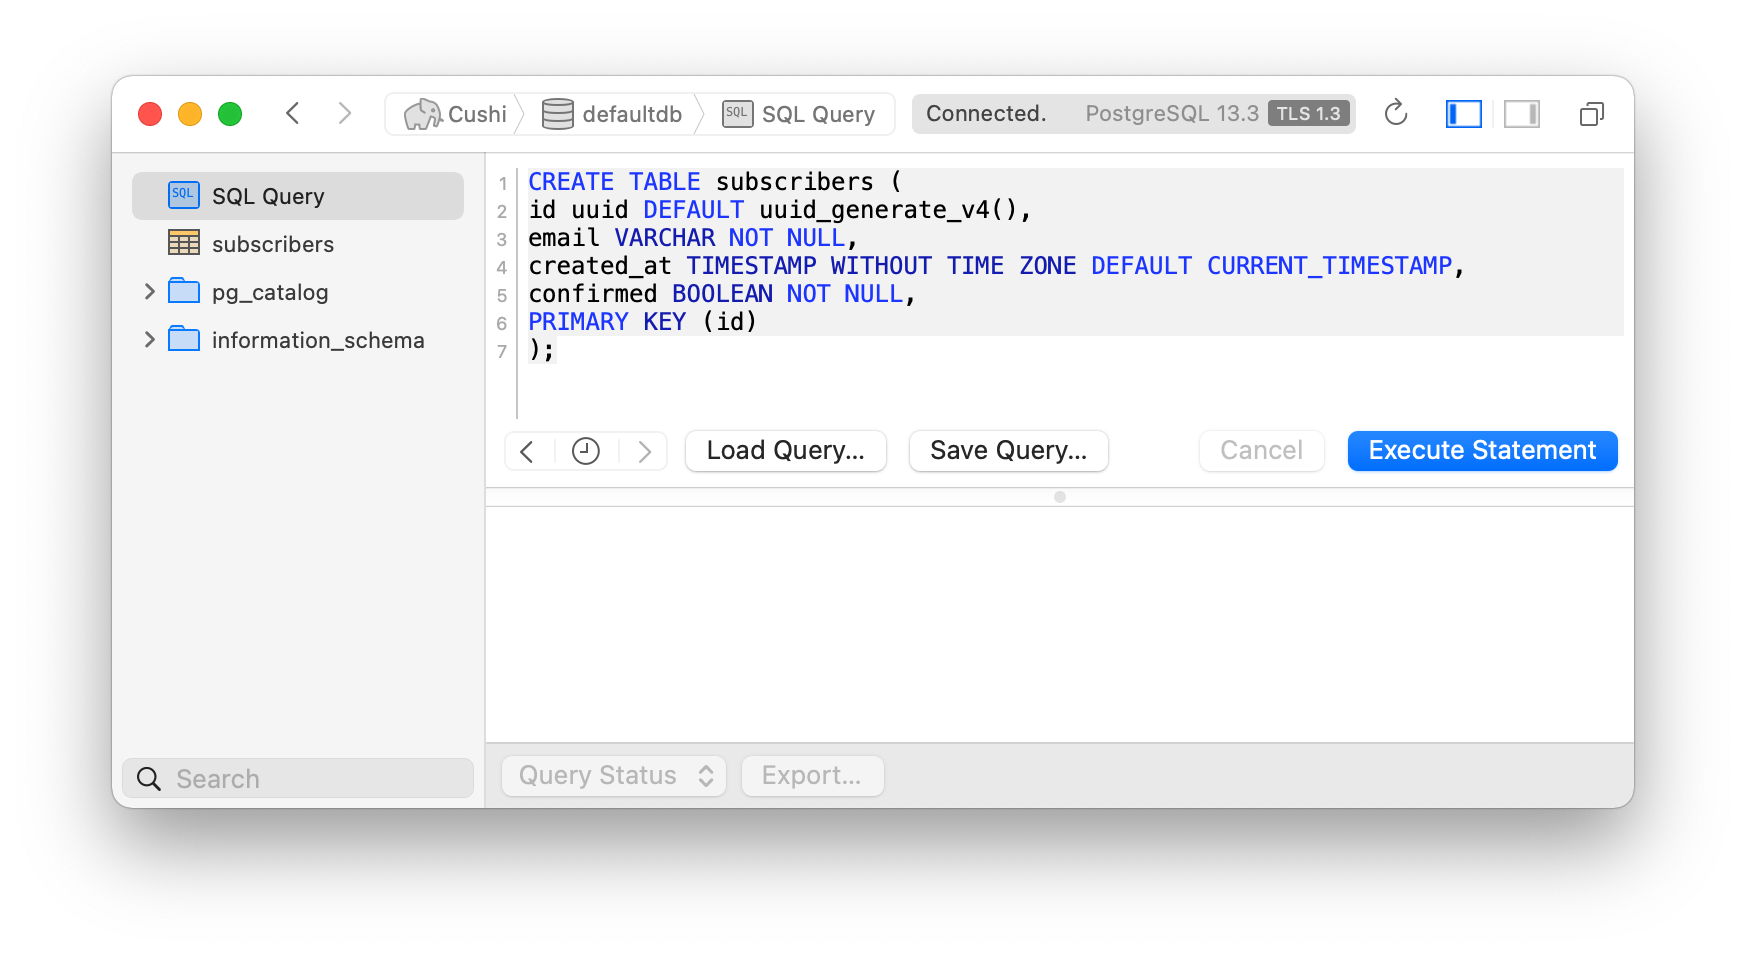
With the database set up, I kept things scrappy and created the subscriber table by executing raw SQL in Postico. At some point, I’ll export a schema, but this project isn’t serious enough for migrations yet. So far, I only need a single table for subscribers, and I’m keeping it simple with columns for id, email, created_at, and confirmed. These columns are all I need for now to confirm subscribers and send emails.
Embedding the subscribe form

To acquire new subscribers, I started with a form on my blog and another one at the end of Cushion posts. These feel like the most intuitive spots, if someone were to land on my blog or if they finished reading a post. I’m curious which one will be more effective, so eventually, I’d like to add a database column for where folks subscribe from.
Confirming email addresses
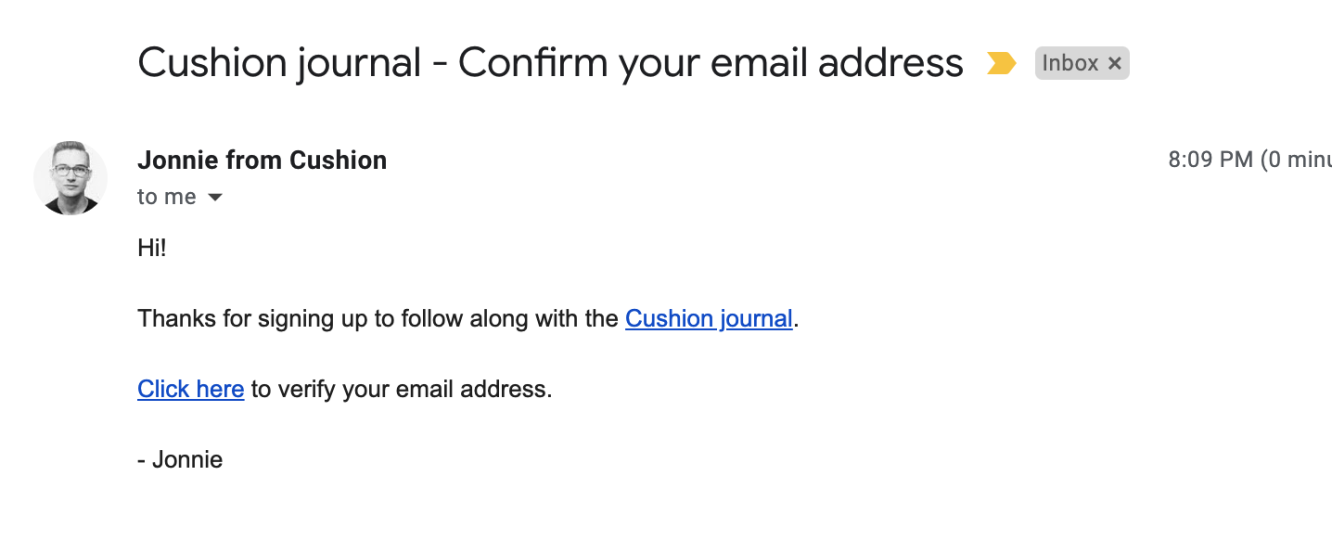
Upon submitting the form, the API endpoint adds a new subscriber row to the database table and sends a confirmation email to the submitted email address—this ensures that the address is valid and can be delivered to a real inbox. I’m keeping the confirmation email dead-simple by only sending text versus designing a new HTML template. Any chance I get to avoid coding an email template, I’ll take it.
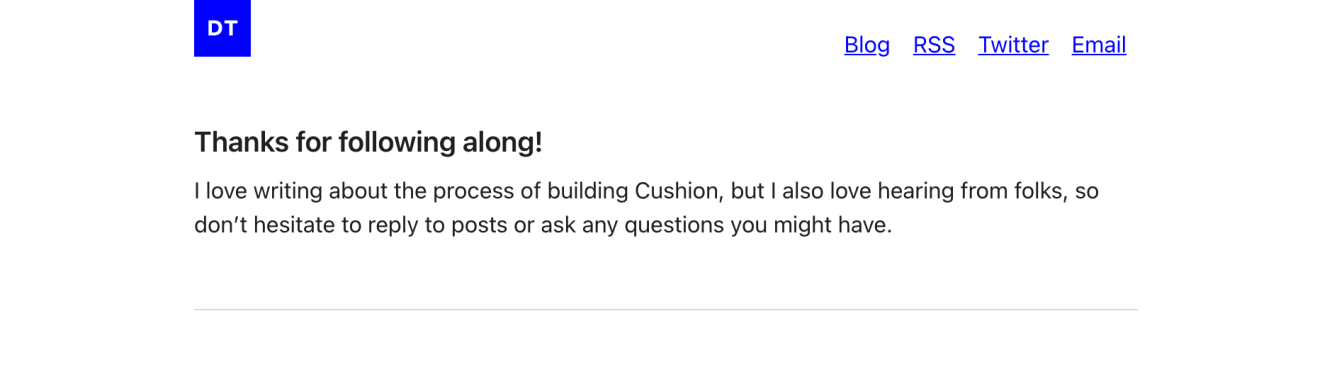
Clicking the confirmation link then sends the subscriber to an API endpoint that updates the confirmed column in the database row and redirects them back to the blog. I use a subscribed=true query param on the blog to indicate that the person has subscribed. This swaps the form out for a confirmation message. The message thanks the subscriber for subscribing, but also encourages them to reach out. Even if I knew no one was reading, I’d still write for myself, but it’s always great to hear from folks, too.
Wrapping up
This concludes version one of the email system. It’s pretty solid, but I can’t help myself from thinking about what else to tack on top. I’m also curious to see if folks prefer to read the journal in an email format, and I’m especially curious if the subscriber list will grow. Nevertheless, I’ve learned so much from the buildout of this system. I’m now familiar with serverless functions, Digital Ocean, and the Contentful SDK, and I can avoid the frustration and cost of a bloated newsletter service. Lastly, I’m much more comfortable writing a scrappy API that doesn’t need to be precious—this will go a long way towards prototyping other ideas. I’ve been wanting to build this system for the longest time. It feels so good to know that it’s finally live.