Journal
Intro to integrations
Several weeks into building Cushion, I started thinking about integrations. Obviously, I was ahead of myself, but I knew integrations would play a vital role in the success of Cushion. Having been a freelancer for a few years at that point, I was aware of the “usual suspects” of freelancing services, and I knew that most freelancers were tethered to these services after years of use. I also knew that many of these freelancers weren’t head-over-heels for them, but the services were so engrained in their day-to-day that convincing these freelancers to jump ship entirely would be an exhausting, uphill battle. Fortunately, this was never the plan.
From the beginning, I wanted Cushion to be more than another equal alternative, feature-matching against every other service. I’ve always seen it as a valuable addition. Instead of trying to make Cushion into an all-in-one Swiss army knife, I could let other services focus on what they do best while Cushion provides a new angle on the same data. Rather than interrupting a freelancer’s workflow, Cushion could be an extension of it—a sidekick to the other services.
A few months went by and I became impatient. I kept thinking about how I’d need to build integrations eventually, so why not get a head-start? “Too soon”—the words of a wise developer in my studio space. He was right, but I was too impatient. To give you an idea of how laughably early this was in development, users couldn’t even change their password yet. I was blind to what Cushion needed at that moment and too focused on what Cushion could do without for now—this is why project managers exist. I spent a few days on integrations before thinking to myself, “Too soon.”
Several more months passed and I got the itch again. This time, instead of trying to build an entirely custom system for integrations, I decided to take a half-step by integrating with Zapier, a service for communicating between APIs. Since Zapier would be doing most of the heavy lifting, I could achieve the functionality I was after by writing a few workflows, like “create an invoice in Cushion when an invoice is created in [another service]”.
At first, this seemed like a step in the right direction, but as I spent more time with Zapier, I knew it wasn’t right for Cushion—I recognized the burden I would be placing on the users. In order for them to integrate Cushion with their existing services, they would need to first create an account in Zapier. Then, they would need to navigate through Zapier, learn how Zapier works, and complete several steps to set up the integration. I would need to write thorough documentation and answer support emails for using Zapier. This wasn’t ideal for anyone.
Simplicity is one of Cushion’s guiding principles, and sending users through hoops on another service is anything but simple. That route is simple for me, the developer, but not for the user. There’s a reason people pay for services—they want to lighten their workload. If this weren’t the case, we’d all be satisfied using spreadsheets. Instead of sending users somewhere else for integrations, I should assume the burden and build a system where the burden is non-existent to the user. Enabling an integration should be as easy as a single click.
I scrapped all the work with Zapier and took a break from integrations for another month. When I returned, I knew exactly how to approach them. Under the hood, I would break the system into four specific parts—services, recipes, authorizations, and integrations.
A “Service” is a 3rd party service that Cushion can integrate with (i.e., Harvest). It has a name and an icon.
A “Recipe” is a type of integration (i.e., Auto-Import). It has a name and a description. A service can have many recipes, which represent the service’s available integrations.
An “Authorization” is a user’s connection to a service. It has an access token and a refresh token. A user can have many authorizations with various services. Authorizations are the key to communicating with the services.
An “Integration” is a user’s authorized recipe for a service. The other models define every aspect of the integration, so it only needs their associations in order to exist.
After establishing the internal structure of integrations, I started to design the exterior. I began mapping out the pages I would need:
all services
an individual service
all authorizations
an individual authorization
all integrations
an individual integration
It didn’t take long for me to realize that I was thinking too much like a developer. Just because I have four models for integrations doesn’t mean each model needs its own index and instance page. I took a step back and started thinking in terms of what I would expect. For integrations, I should be able to view:
services to authorize
my existing authorizations
recipes to enable
my existing integrations
Next, I considered how to structure these lists. I definitely don’t think each one needs its own page, so I thought about how I could combine them. Since integrations are first and foremost about the services, I could use the services to organize everything into two pages—an index page for services and an individual service page. These pages would include more than just the services, but I’d use the services as a top-level category.
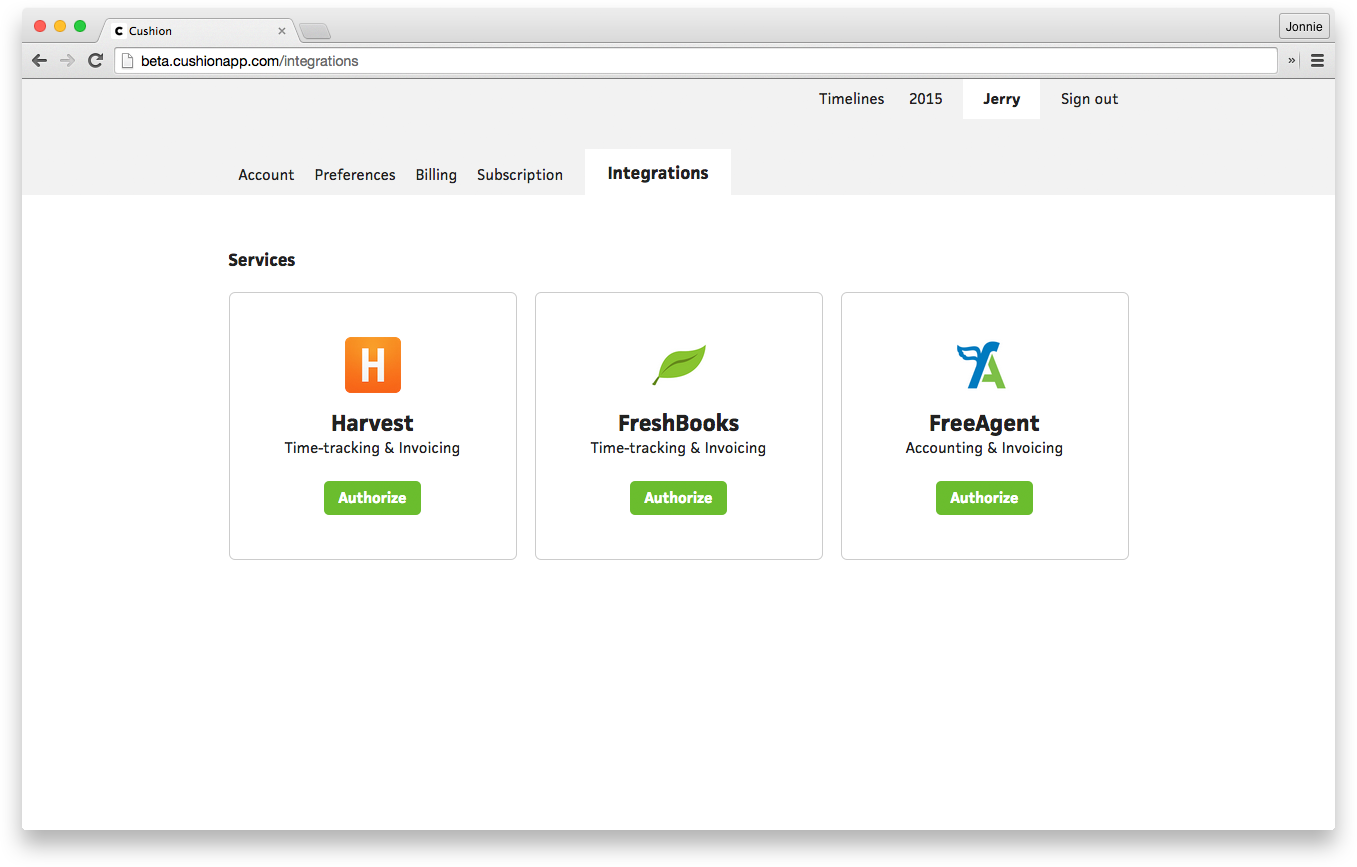
When arriving at the main integrations page, I should see a list of services to authorize. If I haven’t authorized a service, its button should say “authorize” and clicking it should take me through the authorization flow for that service. If I have already authorized a service, it should say “view” and clicking it should take me to that service’s page.
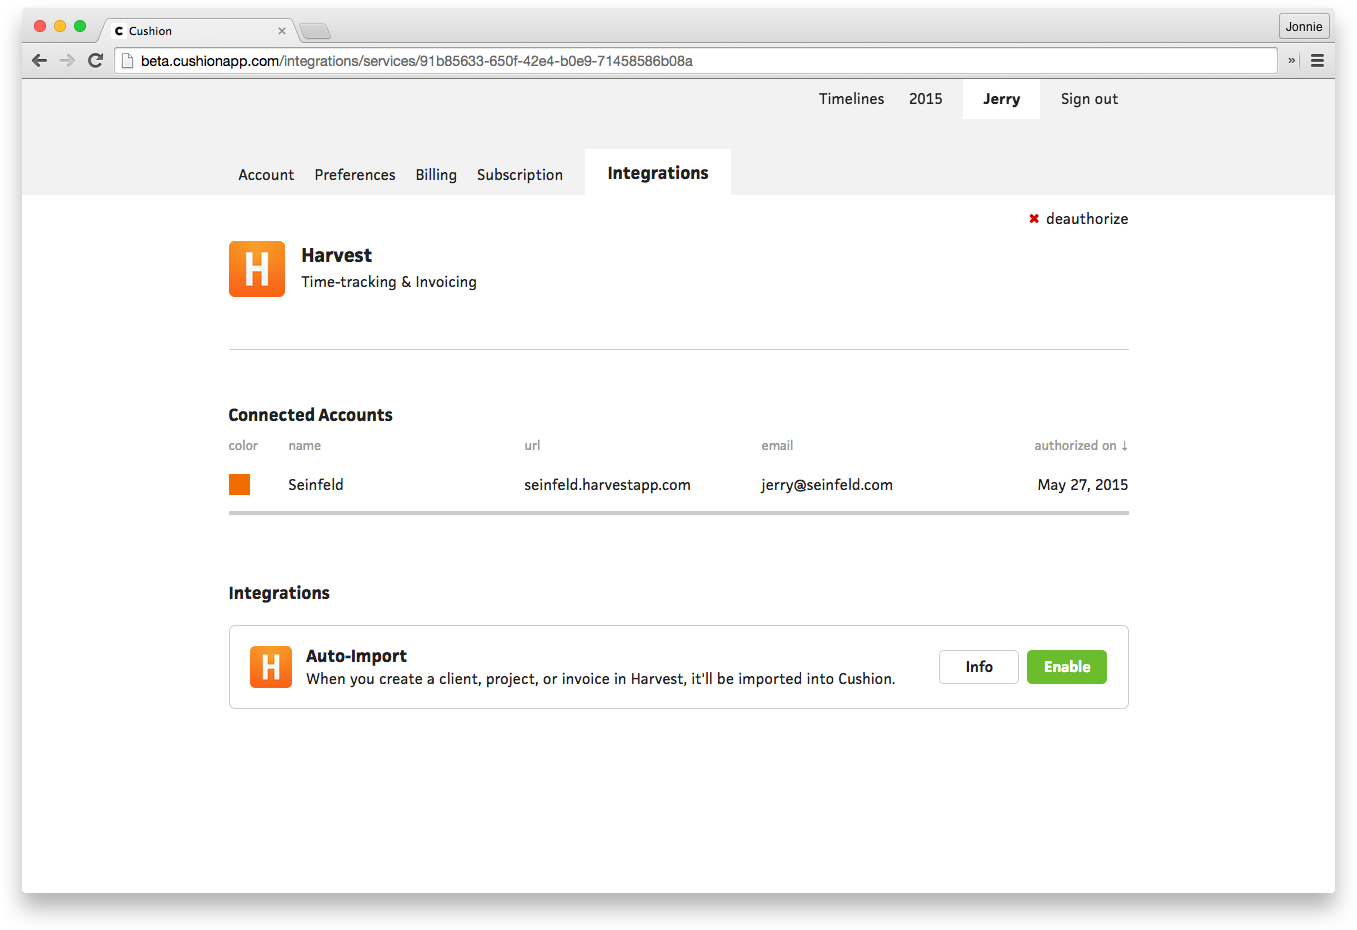
After authorizing a service, I should be redirected to its page, which should include my existing authorizations, integrations, and available recipes for this service. On this page, I should be able to enable/disable integrations and de-authorize the service.
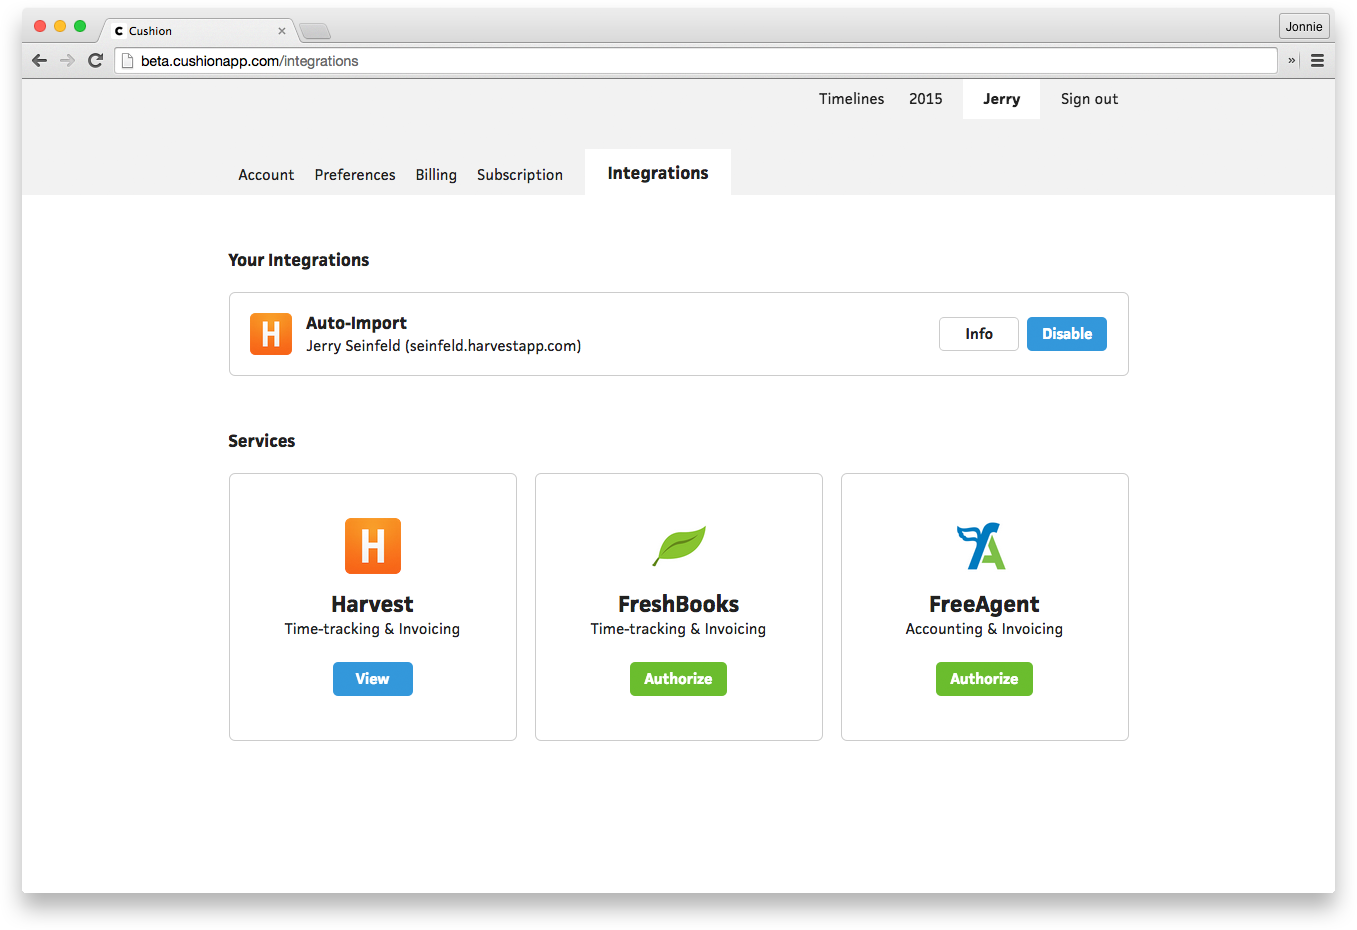
Then, after enabling an integration, the main integrations page should include all of my existing integrations across all services as well as the still-available services.
This layout feels right to me and I couldn’t be happier with how it turned out. Let it be known that I went through a dozen layouts before arriving on this one, so it wasn’t as clear cut as it appears. While figuring out the layout, I also narrowed in on an overall design that matches the rest of Cushion.

Thinking about how to display the grid of services, I decided to revisit the subscription page design. With services only needing a single action button for authorizing, I found that the block design I used for subscription plans would work perfectly.

I swapped out the plan prices with the service icons and replaced the plan names with the service names. Below each name, I included a two-word description for each service to balance everything out. If a particular service is ever down or having issues, I could re-use the ribbon alert to indicate activity if I need to.

I also designed how services will look as I build more integrations for Cushion. For less-common services, I condensed the block, so that two services can fit aside each other in a single row.
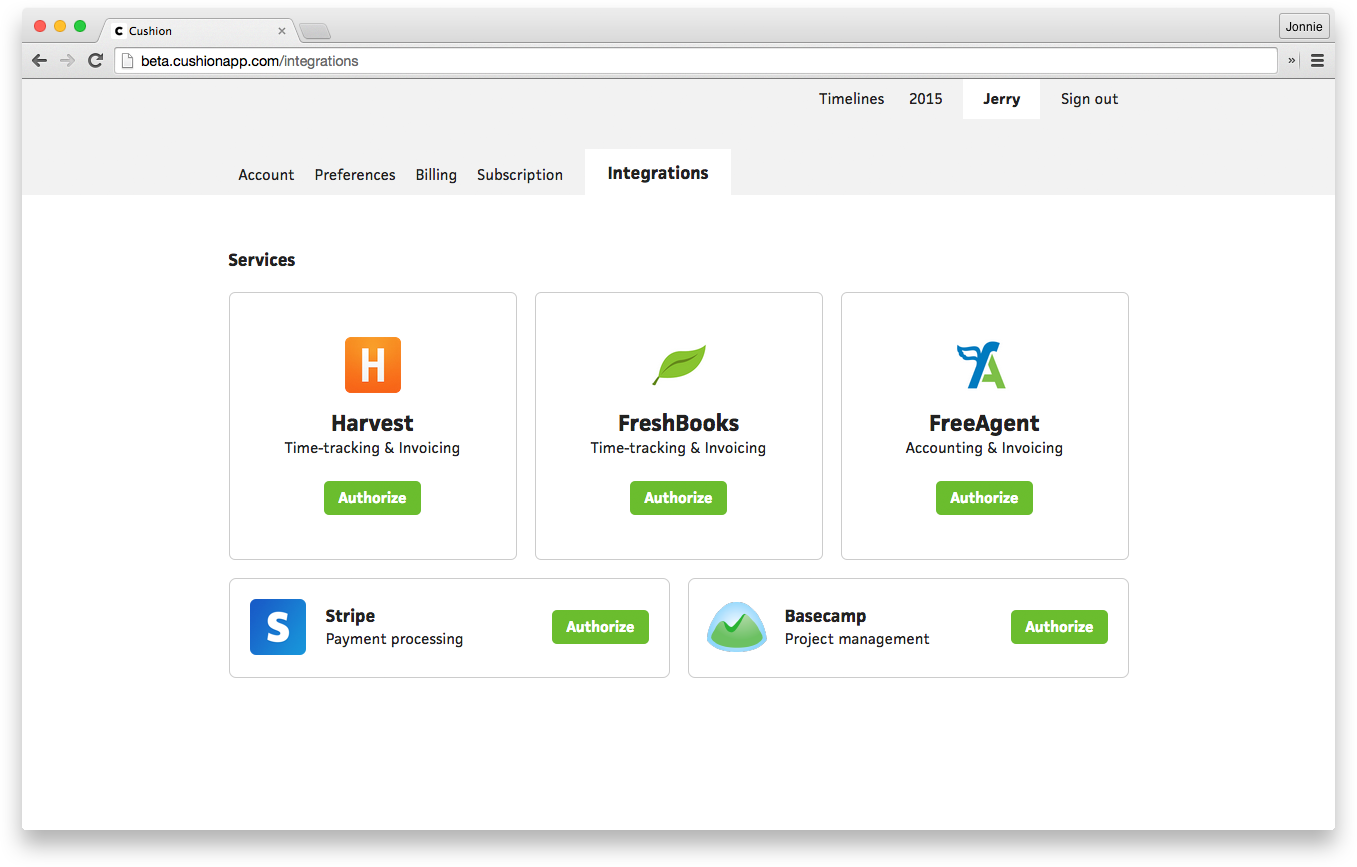
I’m not a fan of integrations pages that are treated like a dumping ground, with the most useful integrations buried beneath obscure services used only by one user. I’d like to establish a better hierarchy, so the primary integrations will sit at the top as square blocks. The less-common services will then rest below them in rows of two. This way, all of the integrations are available for browsing, but the more frequently-used ones will be more prominent.
I couldn’t be more excited about integrations in Cushion. I feel like every integration brings Cushion one step closer to being a household name in the freelance world. By automating the data input process with auto-import integrations, users will be able to visualize their schedule and budget with a single click. I have trouble sitting still in my seat just thinking about this!
Expect to see more posts about integrations in the near future. This one originally included the authorization process and the differences between integrating with FreshBooks versus Harvest, but as you can imagine, it was a bit long-winded. Until next time.